Learn to customize your own blog with confidence

Code it Pretty is an archive of tutorials from 2012-2015. Tutorial details may be outdated. More Info

Twitter Cards for Blogger

This post is outdated. Twitter cards and Blogger have both changed since this was posted in 2012. I recommend this tutorial from my friends at Blogger Xpertise for current Twitter card markup.

Have you noticed lately that some Tweets have a little something extra? Like my Tweets, for example?

These "expandable" Tweets are enhanced with the new Twitter Cards. Twitter Cards show more detail about your posts to give readers a little preview of what they'll see when they click your link. And, the cards work when anyone Tweets a link to your post — not just you. So, if someone else Tweets a link to your blog post, their Tweet will have all the preview details, too!

Today I'm going to share the exact markup I used and the steps I took to get Twitter Cards working for me on Blogger.

Before we get started, there are a few things you should know about Twitter Cards:

There are Three Types of Twitter Cards

In this tutorial I'm going to focus on making a summary card. Summary cards show the title of your blog post, a thumbnail image, a short description of your post, and your Twitter handle. The other two card types — photo and player — are not included in this tutorial, but you can learn more about them from the official Twitter Cards documentation.

Twitter Cards are a New Feature

Twitter added this feature in June, so it's still quite new. Like most new things, these cards are a little quirky. Not everyone will see the cards all of the time or on every browser/mobile platform. Twitter knows this and they're working on it.

They Don't Work Instantly

You have to add the Twitter cards markup to your template, then submit your blog to Twitter for acceptance. After you submit your blog you'll have to wait an unspecified period of time until the cards activate. Some people get an email from Twitter when their cards start working, others don't. I didn't; I just happened to notice that my cards were working about 2 weeks after I submitted my application.

Note: The Dynamic Views template behaves unpredictably if you alter its meta tags. If you'd like to use Twitter cards for your blog, choose a different Blogger template.

As long as you're cool with those caveats, we can get into how to set up Twitter Cards on Blogger!

Step One: Get Your Blog Posts Ready for Twitter Cards

Twitter Cards use your post's Search Description as your summary, so you'll want to make sure that you've filled it in on each post. I posted an in-depth tutorial on how to enable and use the Search Description feature in this post: All About Blogger Search Features.

Step Two: Back Up Your Template

Do not skip this step. You're going to add the Twitter Cards markup directly to your template, so before we do anything else you need to back that template up! Go to "Template" and click the "Backup/Restore" button in the upper right corner. On the next screen, click "Download full template" and save the .xml file. If anything goes wrong while you're adding the Twitter Cards markup you can restore your blog with your backup file.

Step Three: Add the Twitter Cards Markup

Now that you've backed up your template (you did that, right?), click the "Edit HTML" button beneath your "Live on blog" screenshot.

Once you've opened up your template, place your cursor over the code and click once. Open a search box by pressing ctrl-f if you're on a PC, or command-f if you're on a Mac. Type </head> in the search box that appears in the upper right corner of your template code, then press enter. Your template will jump to the </head> tag and highlight the tag in yellow.

Enter this markup directly above the </head> tag:

Before you save your template, change YOUR-TWITTER-NAME to your actual Twitter name.

Once you've done that, click the "Save template" button.

Step Four: Test Your Markup

Twitter has a testing tool for checking your Twitter Card markup here.

On the tester page, enter the URL of one of your posts (NOT your home page, Twitter Cards only work on post pages) and click "Preview Card". You'll see a demo Tweet with your card attached.

Step Five: Submit Your Twitter Cards Application

Once you've confirmed that your markup is working, you'll need to submit your blog for approval. To get started, click the "apply to participate" link on this page (3rd paragraph). When Twitter gets your application, they'll check your markup and approve you (provided everything is in the right place). They may contact you to let you know you've been approved, or you may just suddenly see your cards working, like I did. I don't know what happens if you don't get approved — probably nothing.

Twitter Cards Support

You can find out more about how the cards work and the different types of options available in the official documentation for Twitter Cards. If you have questions, you may also be able to get help on Twitter's developer forum, which has an active Twitter Cards board.

You Don't Need to Move to Wordpress

You don't need to move to Wordpress

I love Wordpress. Self-hosted Wordpress is astonishingly powerful: you can use it to build a blog, an e-commerce site, or a full-blown media empire. I have the deepest respect for the developers and community that surround Wordpress. And, some of the world's most popular and engaging websites are powered by Wordpress.

But, I don't think self-hosted Wordpress is right for every blogger.

Actually, I'm just going to come out and say it: I don't think it's right for most bloggers.

For every mega-blog that has evolved into a media hub requiring all the trimmings of Wordpress, there are thousands of smaller blogs run by individuals, either as a hobby or as a career. These casual and indie bloggers don't need the heavy-duty features — and the equally heavy-duty headaches — of a Wordpress blog.

But that's not what you hear in the the blogging world, is it? I know that moving to Wordpress is seen as a required step in the process of "making it" as a blogger. But every blogger should very carefully weigh the pros & cons (and costs) of moving to self-hosted Wordpress before making the switch. A premature switch can cost you your blog. Seriously.

I've seen self-hosted Wordpress blogs get completely destroyed in hacking waves — and by "completely destroyed", I mean bye-bye blog, all your content is gone. Countless others have suffered lengthy downtime and a costly recovery after getting hacked. And that doesn't even cover those that have simply floundered after an ill-timed jump to Wordpress, getting stuck with an unwieldy theme and no budget or support to get things back into working order.

If you're considering a move to Wordpress, I want you to go into it with full knowledge of the pitfalls you may encounter.

So let's talk about them.

The Wordpress Cons

You already know about the "pros" of self-hosted Wordpress. So let me fill you in on the cons no one wants to talk about. They're multifacted, but they boil down to two main categories: security and cost.

Security

Here's what you have to do to secure your blog on Blogger, Typepad, Tumblr, Wordpress.com, or Squarespace: Use a strong password and never share it with anyone. Some platforms even offer two-step verification to help you keep your login safe.

That's all you need to do; the rest is managed by the blogging platforms themselves.

Here's what you need to do to secure your self-hosted Wordpress blog:
  • Select a web host with rigorous security precautions in place to protect your blog from server vulnerabilities.
  • Select a secure theme. If you're using a free, third-party theme, be sure to check for pre-installed malware before installing the theme on your site.
  • Update Wordpress, your theme, and every plugin you use as soon as each update becomes available (and cross your fingers that nothing breaks after the update).
  • Familiarize yourself with the components of your theme and your plugins, and keep up with Wordpress security news to make sure that none of the features of your blog have fallen victim to the latest hacking wave.

And that's just the highlights: you can read more from the official Wordpress codex.

Now, these issues are not impossible to manage. If you don't mind getting your hands dirty in the backend of your blog, security setup and maintenance is actually a fun challenge and a learning experience. If you're not technically-inclined, you can get all of these issues dealt with by hosting your blog with a managed Wordpress host (WPEngine and Pagely are two great options for managed Wordpress hosting). Or, you can invest in a relationship with a developer who can manage your Wordpress installation on your behalf.

But that brings me to the next item in the "Wordpress cons" column: the cost.

Cost

Yes, the Wordpress.org software is free, but using it will cost you more money or time (or both) than other blogging platforms. There is no way to run a successful, secure Wordpress blog without investing in managed hosting, forming a relationship with a developer you trust, or becoming an entry-level developer yourself.

Managed hosting for Wordpress automates the security and maintenance of a Wordpress blog and keeps you safe from questionable themes/plugins and database hacks. It is, of course, not free: the average managed hosting plan starts at about $25 a month for a small blog. Larger blogs and websites can expect to pay anywhere from $50 - $250/month depending on size and features required.

Good developers that speak your language (both literally and figuratively) don't come cheap. However, a good developer will make your blogging life sweet & serene. They're worth every penny, their weight in gold, and every other financial cliché I can throw at them.

Learning it yourself is rarely free — you can learn from the codex and the official forums, but to go in-depth into security topics and theme design you're better off paying for lessons or books on the subject. And then there's that intangible cost of time. If you're losing time you could use to create great content for your blog, you're hurting your blog.

Of course, the security and peace of mind these investments provide is worth it, but it all costs significantly more than running your blog on Blogger, Typepad, Squarespace, Wordpress.com, or Tumblr.

Do This Before You Switch

If those cons haven't deterred you: good! You're very well prepared for the realities of moving to self-hosted Wordpress. But before you make the jump, let's do a few quick exercises to determine if you really need to invest the time and money it takes to make the switch.

Current Blog Features Inventory
  1. Write down a list of the features of your current blog platform. Pro tip: If you're on a blog platform that has a built-in mobile template, don't forget to add that to the list of features even if you don't personally visit your blog on a mobile device — it might be the format of choice for a big chunk of your readers.
  2. Compare that list with the core features of Wordpress. Look into what it will take to add all of those features to Wordpress (themes, plugins, etc).
  3. Estimate the time and cost of moving your blog to Wordpress with all of its current features intact.

Now that you've done an apples to apples comparison between your current platform and Wordpress, let's move on to your dream features.

Feature Wishlist
  1. Write down your dream features for your blog.
  2. Confirm that those features really aren't available on your current blog platform. You may be surprised!
  3. Find out how you'd implement those same features on Wordpress, and make an estimate of the realistic cost (in time or money) to add them to your blog.

If self-hosted Wordpress is still the winner after you've done those exercises and considered all the costs and challenges, go to it! You have my blessing.

If Wordpress isn't the right choice for you, but you're still feeling like you're stuck in your current blog platform, I've got something to show you:

Hugely Successful Blogs on "Starter" Platforms

These popular and authoritative blogs are all on "starter" blogging platforms — and nobody cares. Consider the success of these blogs when you're worried that your platform is holding you back.

Kendi Everyday: This wildly popular everyday fashion blog is beautiful on Blogger.

Seth Godin's Blog: Mr. Godin rocks a default Typepad template, and he gets about a thousand retweets per post.

CarScoops: This automotive blog gets millions of readers every month. It's on Blogger.

Strobist: Yet another eminent blog that very openly runs on Blogger. Heck, they haven't even hidden the navbar. If your concerned that a "starter" blog design will scare off sponsors, check out their ad rates. Clearly, advertisers can deal with the plain design. They want to be associated with the blog's stellar content.

What I hope you'll see from these examples is that blog success doesn't have much to do with what platform you're on. Great, unique content wins every time. You can build an amazing, engaging blog anywhere. If you're happy where you are, stay there, and keep doing what makes your blog great.

Post image by the fabulous Cris Stone

All About Blogger Search Features

Earlier this year, Google quietly released some helpful new search features for Blogger. The new options improve your blog's appearance in search results and boost its usability for your readers. They were so quiet about it, though, that many bloggers still have no idea these options are available. It's almost like they're a secret!

You know I can't stand to let you miss out on good Blogger stuff, so let me show you what they can do!

To get started, go to Settings > Search Preferences, and click the "edit" link under Meta Tags: Description. Set the "Enable search description?" radio button to "yes", and press save. You'll go back to set your blog's description in a few steps, but let's get started with the post search description.

Search Description

You can find the search description option in the right column of your post editor. It's under "Post settings".

Your search description is your chance to give readers a little preview of your post before they click on your link from a search engine or social network. Here's an example of a search engine result for my Pinterest gadget for Blogger post:

search engine result for Code it Pretty that reads: A jQuery-based Pinterest widget to show off your latest pins on your Blogspot - Blogger blog.

That summary below the link is the custom search description I wrote for the post. It gives potential visitors a good preview of what they'll read if they click on the link. It's short; I kept it under 160 characters because that's the limit of what Google will show on a search engine result. Other search engines will show slightly more, but I think it's best to stay under the lowest limit.

Notice that I wrote this description as a normal sentence, not a series of keywords. That's because the search description is meant for humans. Write your search descriptions in the same voice you use on your blog. You're talking to people here, not robots!

Search Descriptions Work on Facebook, Too

As if the search engine results weren't cool enough, there's another nice benefit to filling in a search description: it gives you control over how your post is described when it's shared on Facebook. Take a look:

Blogspot blog post with custom search description, as it would appear on Facebook.

Great, right? That definitely beats the random excerpts Facebook used to grab from Blogger posts!

Search Preferences

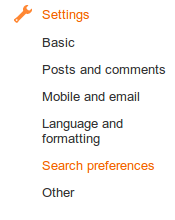
Now let's move on to the new search preferences, which you can find under Settings > Search Preferences.

Blogger settings, search preferences

These new search preferences give you more control over how your blog shows up in search engine results, and let you control what happens when a vistor follows a dead link to your blog. Here's what they do:

Meta Tags: Description

The Description describes your blog to search engine visitors, in the same way the search descriptions describe your individual blog posts. Here's what my custom description looks like in a Google search:

custom meta tag description for Code it Pretty, as seen in Google search results

Again, keep it brief and human-friendly!

Custom Page Not Found

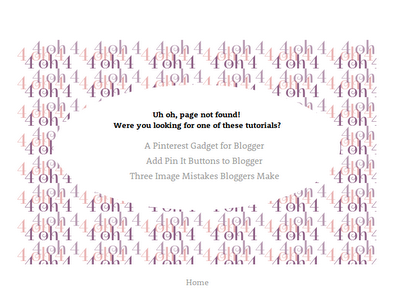
Once in awhile, your readers will follow a dead link to your site and land on your "page not found" error page (also known as a 404 page). The new, "custom page not found" option allows you to customize what your readers see when they land on this page. Now, instead of a discouraging error message, you can give your readers a useful page that can help them find their way to the right part of your blog.

Code it Pretty's custom 404 page

I've added a set of links to my most popular posts on my "page not found" page. And, since the page accepts HTML, I was able to format my links as a list and style the page with CSS. You can see a live example of my custom "not found" page at: http://www.codeitpretty.com/fourohfour.html, or read about how I made it in this post.

Custom Redirects

Not everyone is going to need custom redirects for their blog, but they're incredibly useful in some situations. Here are a couple of good reasons to use custom redirects on your blog:

Correcting misspelled inbound links

Raise your hand if this has happened to you: you tweet a link to your blog, the tweet gets retweeted by your wonderful followers — and then you realize you left off the .html at the end of the URL. In the past, that meant anyone clicking that link would go to your "page not found" page. But, now you can take your misspelled link into your custom redirect editor and point them to the correct page in your blog. Select the "permanent" checkbox to lock the change in.

Redirecting traffic from obsolete pages and posts

If you've removed a popular post or page from your blog, you should redirect traffic from that old page or post to another part of your blog. That way, visitors following older links to the removed parts of your site will get content, not an error page. To keep your readers happy, try to make sure you're redirecting them to the most relevant existing page.

For example, if you remove a cupcake recipe that calls for an ingredient that's no longer available, you should redirect the link to a revised version of the cupcake recipe or a general cupcake recipe section; the more similar the content at the new link is to the content at the old link, the better. That way your visitors are less likely to be confused or annoyed by what they find at the redirected link. Again, select the "permanent" checkbox to lock the change in.

This also works if you've moved to Blogger from a different platform, but kept the same domain name. You may have old links out there to static pages on your old site that don't coorespond to the URL structure of your new Blogger static pages. You can redirect traffic from those old links to your new Blogger pages using the custom redirects.

Temporarily redirecting visitors to a more timely post

Here's another example: let's say you host an annual giveaway for one of your sponsors, and you've been doing it for three years. You still get visits to the old giveaway posts, and many other bloggers have linked to your older giveaways. You can temporarily redirect all of the traffic coming to those older links to your current giveaway, so that your new visitors have a chance to enter the giveaway that's actually taking place. All you have to do to set up a temporary redirect is leave the "permanent" checkbox unchecked, then save the redirect. Once the giveaway is over, you can delete the redirect and traffic will flow to the old pages like it used to.

Crawlers and Indexing

Did you notice the "Crawlers and Indexing" section of the Search Preferences area? Then I'm sure you also noticed the big "Warning!" banner above it. I'll keep this part super-brief: just leave that alone. I know, I know, I'm being vague. But, if you need to use one of those features, you probably don't need me to tell you how to use it. If you're curious, you can check out http://www.robotstxt.org/robotstxt.html for everything there is know about robots.txt.