Learn to customize your own blog with confidence

Code it Pretty is an archive of tutorials from 2012-2015. Tutorial details may be outdated. More Info

The Font Combinator - Find Beautiful Web Fonts

The Font Combinator, a web typography tool

I love Google Web Fonts. They're free, they're stylish, and they're easy to use on any website. There's one thing lacking from the web fonts interface though — it's not easy to preview how different fonts look together. That's where developer Chip Cullen's web app, The Font Combinator, comes in!

The Font Combinator is so easy to use it barely needs a tutorial, but I want to give you a rundown of its features so you can use it to its fullest right away.

To start using the Font Combinator, go to www.font-combinator.com.

the font combinator website

At the top of the page you'll find a sample article with a headline, subhead, and two paragraphs. At the bottom of the page you'll find simple controls for changing the font, the font size, the line height, the color of the text, and the color of the background.

The Font Combinator includes all of the Google Web Fonts, plus the traditional "web safe" system fonts like Arial, Helvetica, and Times New Roman. So handy for setting fallback fonts! The combinator automatically updates when a new font is added to the Google fonts collection, so it's always up to date.

Here's an example of the Font Combinator in action: I've selected three fonts for this demo. The headline is Syncopate, the subhead is Rammetto One, and the body text is in good ol' Georgia. I've also played around with the colors using the Combinator's built-in color picker.

font combinator in use demonstrating different fonts

Did you notice that I changed what the text says, too? Yet another cool feature! You can delete the default headings and paragraphs and replace them with your own.

You can hide portions of the demo text if you're not going to use all of the elements in your design. So, for example, if you're not planning to use a subhead and just want to test a headline and a paragraph font, you can easily hide the subhead by clicking the "hide" button. If you want it to come back, click the "show" button.

Here's another useful detail: if you resize your browser window, the combinator resizes along with it. This way you can test how your fonts will look in different sections of your site or in different viewports, and adjust your sizing (or font choices) accordingly.

I've spent hours playing with this addictive design tool, and if you're a font fan like me I bet you will, too! Many thanks to Chip Cullen for his hard work on this awesome app.

Installing Google Web Fonts

After you've chosen the perfect font, you're ready to install it! Check out How to Install Google Web Fonts on Your Blog for installation instructions.

Fonts in the title card: Alegreya SC and Pinyon Script, selected with the Font Combinator, of course!
Embellishments: Creative Market

All About Alt Text

all about alt text

In my earlier post about blog images I sung the praises of alt text, but I didn't go into detail about the whats, whys, and hows. This basic piece of HTML is so essential to your blog's health that it deserves its own dedicated tutorial. So today I'll dig in deep and give you the tools to become an alt texting master. Let's get to it!

What is Alt Text?

One quick semantic note: it's "alt text", not an "alt tag". People will still know what you're talking about if you call it an alt tag, but to be correct, say alt text!

Alt text is an attribute you add to an HTML image element to describe the image. If you write your alt text well, you'll help your visitors and search engines get a better understanding of your content.

So what do you write as alt text? It all depends on context.

man wearing nothing but a scarf, wielding knitting needles like weapons in a comedic fashion

This awesome photo could be used in many different types of blog posts. In a tutorial on knitting the scarf he's wearing, I'd describe it as "man wearing a striped red and pink scarf". If the kinda threatening pose he's taking with those knitting needles is more relevant to the post, "man poised to attack with knitting needles" makes good alt text. If his near-nudity is more relevant to the post than the other aspects of the photo, I'd go with "man wearing nothing but a pink and red scarf".

If the picture itself is the subject of your blog post, the alt text doesn't need to be very detailed. For example, if my post is an interview with scarf guy about why he posed like a crazy knitting monster, the alt text can be "Joe Blow in a scarf" (I'm pretty sure Joe Blow isn't his name, but you get the point).

Why Should I Use Alt Text?

Two very good reasons:

1) First, and most importantly, it provides information to visitors who cannot see the images on a website, either due to visual impairments or because they have images turned off in their browser. People with visual impairments use screen readers that read the text from a website out loud to them. The screen reader reads the alt text to describe visual elements of websites. Visitors browsing without images will see the alt text in place of the images.

2) Second, alt text provides information about an image to search engines. Without alt text, search engines don't know what they're "looking" at when they encounter a picture. So, your alt text is an opportunity to describe your image to search engines.

This is especially important if your blog posts have lots of images. Providing alt text will help bring visitors to your site since the search engines will have more detailed information about what your blog has to offer. It also greatly improves your chances of showing up in image searches, like Google Image Search or Bing Images.

Now, this does not mean that you should stuff keywords into your alt text. I can't stress this enough: always, always, always consider your human visitors when you write alt text. Visitors with visual impairments will hear all the words in your alt text read aloud, and you need to respect that. You shouldn't describe scarf guy as "knitting needles on sale, best knitting needles, cheap knitting needles, knitting, how to knit a scarf". That's not an accurate description of the photo and it's an insult to anyone who has to listen to that from a screen reader.

How Do I Add Alt Text to My Images?

Some blogging platforms prompt you for alt text when you upload a photo. Just fill in your text in the "alt text" field and you're good to go. Other blogging platforms auto-fill the alt text for you using the image's filename. If your blog uses your filenames, make sure you give the photos good, descriptive names. "DSC483012.jpg" is not a good name.

If your blogging platform doesn't have a built-in method of handling alt text, or you skipped alt text in old posts and want to add it in now, you can manually add it to your images. To do this, go into your posts in HTML view and look for your image elements.

In HTML, an image element (at its absolute minimum) looks something like this:

<img src="images/naked-scarf-guy.jpg">

You add alt text to the element after the closing quotation mark on the image source, like so:

<img src="images/naked-scarf-guy.jpg" alt="man in a scarf wielding knitting needles">

By the way, if your blogging platform doesn't support alt text or makes it hard for you to add it, complain! Alt text is a basic HTML feature and it should be easy for you to use.

How Long Should Alt Text Be?

There's no absolute limit on alt text length, but the general consensus is that you should keep it brief — no longer than a tweet. Remember that your visitors with visual impairments will have the alt text read out loud to them by their screen reader, and you don't want to bore them with pointless details.

One case where it's ok to get wordy with your alt text is when you're presenting an infographic or otherwise visualized data without any accompanying explanation. For example, it makes good sense to put all the steps of a simple flowchart into the alt text if you're not going to spell out the steps in an accompanying paragraph — if your graphic is very complex, though, it's best to provide a written alternative to the image and keep the alt text brief.

Do I Need to Add Alt Text to Every Image?

You should add an alt attribute to every image, but you can (and should) leave the attribute blank on purely decorative images. For example, if you have an image of a pretty squiggly flourish separating sections in your blog's sidebar, your readers with visual impairments don't need to hear anything about it — it's just there to add visual appeal and has no functional or informative purpose. Leaving the alt attribute blank tells a screen reader to ignore the image entirely. To leave the alt attribute blank, just don't put anything in the quotation marks after alt=. Like this:

<img src="images/fancy-squiggle.png" alt="">

Leaving the alt attribute blank also makes sense if adding alt text would be repetitive. For example, if you have a post titled "A Photo of My Dog" with a captioned photo of your dog at the top of the post, and the first sentence of your post says "Check out this cute picture of my dog!", blank alt text spares screen reader users from hearing essentially the same thing four times in a row.

In Summary

Well-written, relevant alt text provides valuable information about your blog to both your human visitors and search engine robots. Keep it brief and to the point, and leave it blank on non-essential decorative images. And remember, it's alt text, not an alt tag ;)

Further Reading:

WebAIM has in-depth information about how to write the right alt text for an image in context.

For even more detail, check out the official guide to HTML5 alt text techniques from the World Wide Web Consortium (W3C). The W3C develops HTML standards, so you know this information comes straight from the top!

The Firefox add-on Fangs shows you what a screen reader would read out loud from your blog. This is a fascinating tool that can help you discover accessibility issues on your site and get a better feel for how readers with visual impairments experience your blog.

Scarf Attack photo by Flickr user TheGiantVermin, used under Creative Commons license.

Hands On with WooDojo

An introduction to WooDojo by WooThemes

This post was written when WooDojo first launched. The plugin suite has been updated and expanded extensively since. You can read about the current WooDojo options on WooThemes' website.

I'm a big fan of WooThemes' Wordpress themes. I'm especially fond of the powerful features they pack into their designs. So I am super excited about WooDojo! It's a badass little bundle of Woo power built to work with ANY Wordpress theme. And it's free!

I spent some time playing with WooDojo so I could share its goodness (and some of its quirks) with you. Let's have a look, shall we?

Installing WooDojo

WooDojo installs like any other Wordpress plugin. You download it directly from WooThemes, then upload it into your theme by going to Plugins > Add New > Upload.

Once installed, WooDojo shows up in the Wordpress menu beneath Jetpack with a cute little Dojo icon.

WooDojo icon in Wordpress menu

When you click the WooDojo icon you'll go to the Dojo, where you'll find individual control panels to turn on each of the WooDojo features and install the two additional Wordpress plugins included with WooDojo. All of the features work independently so you can just turn on the ones you want to use and leave the others off.

WooDojo control panel

Let's go through each of these features one-by-one and see what it does!

Bundled Features

Login Branding

This is a great option for branding a group or community blog. You can upload your own logo to personalize your Wordpress login screen, like so:

Wordpress login screen with a custom logo

You can also set the clickthrough link on the logo so it goes to any URL you want.

Custom Code

The custom code option lets you add your own CSS and HTML to your theme without digging into the guts of the theme (and, let's be honest, possibly screwing it up). This is a handy way to try out new styling on the fly, and remove it just as quickly if something goes haywire.

You can add Custom CSS:

custom CSS option in WooDojo

And enter custom HTML for the <head> tags or just before the </body> tag of your website (Hello, Google Analytics!).

custom HTML option in WooDojo

ShortLinks

The ShortLinks plugin makes it easy to generate tweetable, trackable shortlinks for your blog posts. As a default the ShortLinks are set to use the native Wordpress shortlinks (the ones that end with p=some number). If you've got a Bit.ly account you can enter your account info to use Bit.ly links, or you can use the TinyURL link shortening service.

shortlink control panel in WooDojo

Tabs

The WooDojo tabs widget displays your blog's latest posts, most popular posts, most recent comments, and recent tags in a tabbed widget. I've got to be honest with you about this widget, though. It needs some cosmetic work. It looks scrunched up and has some overlap on the tabs in normal-sized sidebars. It looks best in a wide footer area where it has a little room to spread out. I'm hoping WooThemes will give it a little more polish in the next update! If you want to give it some polish yourself with some custom CSS, .widget_woodojo_tabs selects the widget tabs.

WooDojo tabs widget

Social Widgets

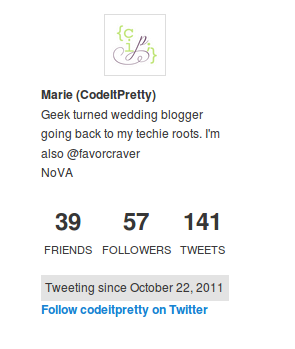
By "social widgets" they mean "Twitter widgets" right now, but I wouldn't be surprised if new social media services get added to WooDojo updates. There are two Twitter widgets in WooDojo. The first is the Twitter Profile, which has a lot of customization options. You can choose to display or hide your avatar, name, screen name (your Twitter username), description, location, tweet count, followers count, "friends" count (people you follow), "Tweeting since" date, and a follow link. Here's a look at the control panel for the widget:

options panel for WooDojo Twitter Profile widget
Here's an example of the Twitter Profile with every option enabled:

WooDojo plugin Twitter Profile

I'm not sure why they chose to call people you're following "friends", but you can hide that if you think it's dorky.

The second Twitter widget is a classic twitter stream with nice, fine-tuned options. You can set how many tweets to display, specify if you want to show your retweets, show or hide reply tweets, and add an optional follow link. Here's a screenshot of the Twitter widget in action:

WooDojo twitter widget

Now that we've checked out everything in the bundled features, let's move on to the Wordpress Plugins!

Wordpress Plugins

You'll need a free WooThemes account to download and install the Wordpress Plugins included with WooDojo. Signup is quick and you'll have access to the WooThemes public support forums along with the two quite powerful plugins.

WooSidebars

Have you ever wanted to show a specific widget only on certain parts of your blog? WooSidebars let's you do exactly that!

This plugin allows for some deep customization of widgets, so I'm just going to do a quick demo of one of the ways you can use it. For this demo, let's say you want to show your Twitter stream widget on post entry pages only, so your readers would only see it if they were on a single post's page, but not on the home page and not on any static pages.

To set up the custom widgets, first go to Appearance > Widget Areas.

WooSidebars widget areas in Wordpress

In the Widget Areas section, click Add New. Give your widget area a name and a description.

WooSidebars new widget area

At the bottom you'll see a "Conditions" area. This is where you set up the rules for where the custom widget areas will appear. To set the widget to show up on post pages only, click Advanced > Post Types > Individual Posts.

setting WooSidebars for post pages only

Next, from the dropdown menu at the left, select the sidebar you want to replace with your new sidebar widget. You can choose left or right sidebar areas, or footer areas.

selecting which sidebars to replace in WooSidebars

After you've chosen which sidebar to replace, publish the widget area.

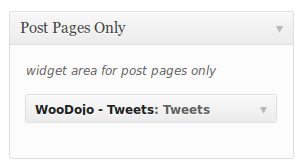
Once the widget area is published, you can go to Appearance > Widgets and find your custom widget area. Drag and drop the widget you want to display in that area (I'm dropping in the WooDojo Tweets widget) and save the widget.

dropping a widget into a WooSidebars custom widget area

Now, go check out your blog! On the home page you won't see the custom widget. But, when you click an individual post, there it is! In this demonstration, I've replaced the primary widget area with the custom widget area to show off the tweet stream.

a Wordpress blog homepage vs a post page with WooSidebar custom widget areas enabled

This is just the simplest example of what you can do with this very powerful plugin. You can use it to finely target ads, show links to blog posts that relate to specific static pages, or vice versa... seriously, possibilities are endless.

WooCommerce

WooCommerce is a fully-featured e-commerce plugin that turns your Wordpress installation into an online store. The many robust features of this plugin deserve their own full-length post; you can find details on WooThemes WooCommerce page, and a good third-party tutorial at OS Training.

Getting Help with WooDojo

WooThemes has an active support forum where you can get help from other WooDojo users and from the developers themselves. Questions get answered quickly over there, and since WooDojo is new the developers are taking and responding to suggestions, critiques, and requests in the forum.

Are you using WooDojo? What do you think? Let me know in the comments!